Voice assistants are everywhere, but what if you could build one yourself? This ESP32 Voice Assistant project demonstrates how to combine a microcontroller, artificial intelligence, and text-to-speech technology to create a custom smart device. Unlike commercial voice assistants, this one uses predefined prompts and only communicates when you press a button, giving you complete control over when your device interacts with the cloud.
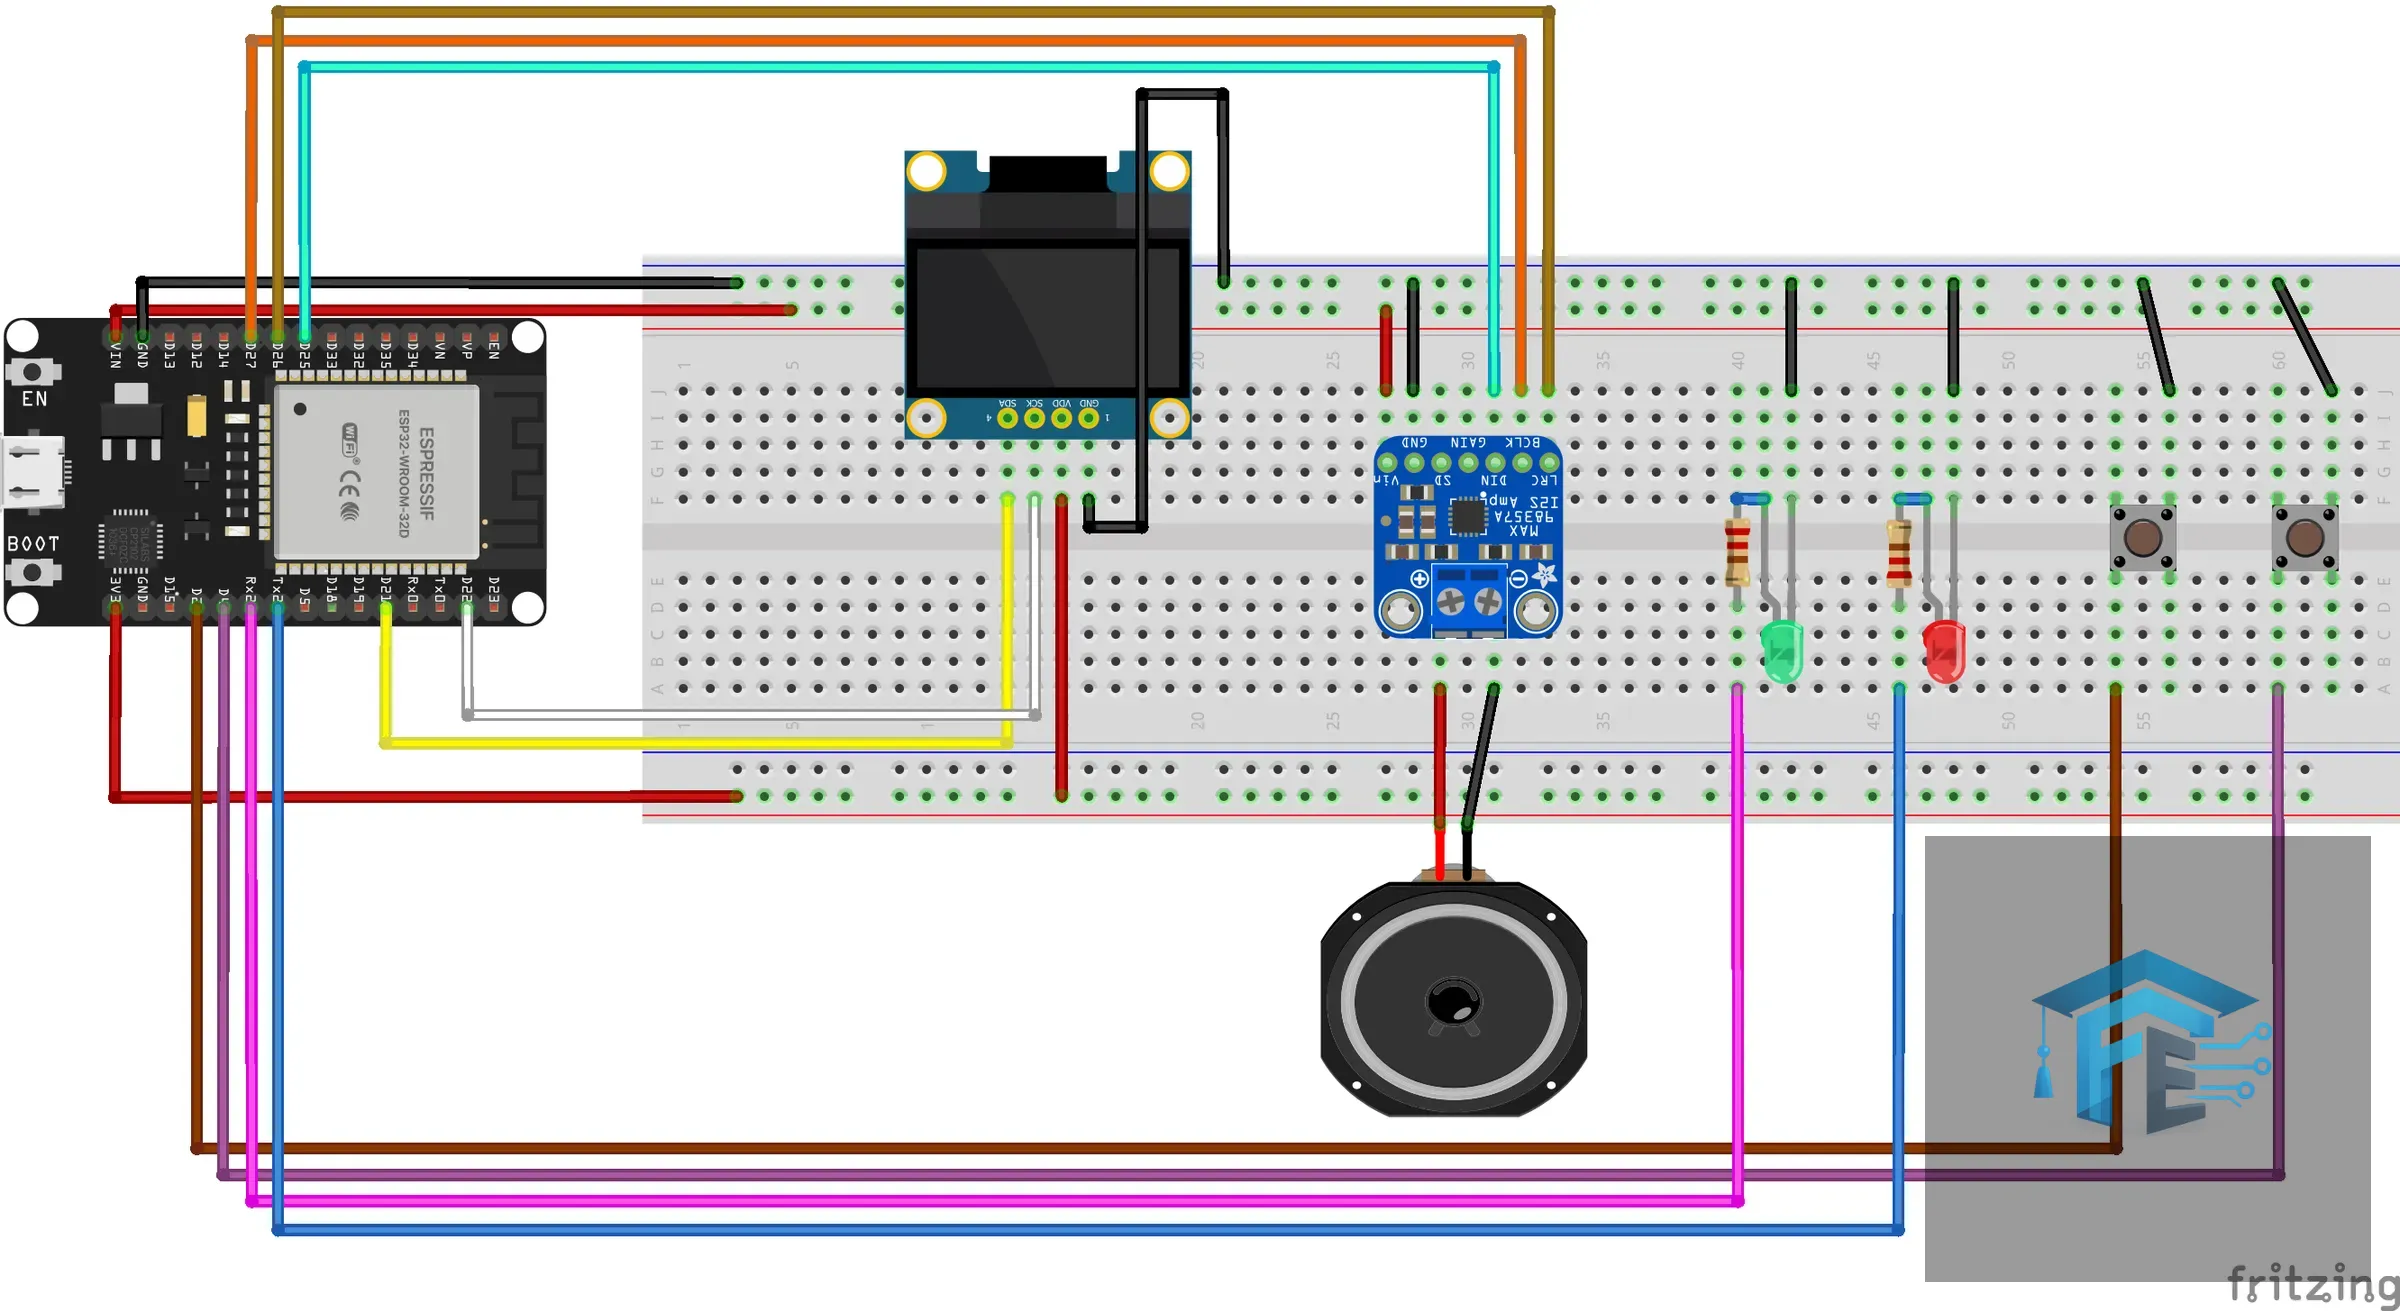
The project uses an ESP32 microcontroller as the core hardware, paired with an OLED display for user feedback, push buttons for input, and a speaker for audio output. The ESP32 connects to a Python server running on your computer or a Raspberry Pi, which handles requests to Google's Gemini AI API. When you select a phrase and press the 'Speak' button, the ESP32 sends your prompt to the server, receives an AI-generated response, converts it to speech using Google's text-to-speech service, and plays it through the speaker. LEDs provide visual feedback throughout the process, turning red while thinking and green when ready.
Getting started requires three main steps: hardware assembly, ESP32 firmware programming, and server setup. The wiring connects your components to the breadboard with jumper wires, ensuring all grounds are connected to a common rail. Next, you'll use the Arduino IDE to program the ESP32, installing the necessary board package and libraries like Adafruit's GFX and SSD1306 libraries. Finally, you'll create a Python server on your computer that manages API calls to Gemini and handles text-to-speech conversion.
One clever aspect of this project is how it manages API costs. Rather than transcribing voice or engaging in open-ended conversations, you select from predefined phrases displayed on the OLED screen. The Python server also deliberately limits response length to minimize token usage, making the system both efficient and economical to run. This approach teaches important lessons about working with cloud APIs responsibly.
The hardware requirements are straightforward and affordable. Beyond the ESP32, you'll need a 0.96-inch OLED display, a MAX98357A I2S amplifier with a small speaker, two tactile buttons, LEDs, a breadboard, and a USB power supply. All components are readily available from electronics retailers. The software side requires Arduino IDE for the ESP32 and Python 3 for the server, plus a free Google API key from Google AI Studio.
Once assembled and configured, operating the assistant is simple. After powering up and connecting to Wi-Fi, you press the 'Next' button to cycle through predefined phrases on the display. When you find the one you want, press 'Speak' and watch as the device contacts your server, processes the request through Gemini, converts the response to speech, and plays it back. The entire interaction takes just a few seconds.
This project is an excellent introduction to several interconnected technologies: microcontroller programming, cloud API integration, text-to-speech systems, and IoT networking. It demonstrates practical problem-solving, from managing Wi-Fi connectivity on a resource-constrained device to efficiently handling API requests. Builders can extend the project by adding a web interface for custom prompts, integrating additional sensors, or experimenting with alternative text-to-speech engines or local voice models.
Whether you're learning electronics for the first time or expanding your skills with AI integration, this ESP32 voice assistant offers a tangible, functional result you can hold in your hands. The complete code and detailed wiring diagrams are available on GitHub, making it accessible even for beginners. With careful attention to each step and some patience during the assembly and programming phases, you'll have a working voice assistant that showcases the impressive capabilities of modern microcontrollers combined with cloud artificial intelligence.

No comments yet — be the first to share your thoughts.